Section 5: Mathematics & Engineering
5.1 CALCULATING AVERAGES (Run time: 4:46)
☛ video (english)
☛ video (espanol)
This video teaches students what an average of numbers are, and how to calculate it.
☛ Learning Objectives:
1. Be able to calculate averages on a series of numbers.
2. Following directions.
☛ Applicable Education Standards:
|
| NGSS
| SE Practices 5 and 8
|
| CCSS
|
3.OA.C.7; NBTA.A.2; 3MD.B.3; 4.OA.A.2, 3; 4.NBT.B.5, 6;
6.SP.B.5c
MPs 1, 2, 3, 6
|
|
THE EXTRA MILE: the beat goes on: averaging and graphing activity
in Appendix A
5.2 MATH RATIOS
ABOUT THE SERIES
Explain what math ratios are and how are they expressed. Students will see
examples of relationships/proportions of things that constitute a ratio.
☛ Learning Objectives for students:
- Be able to define the term 'ratio' and give examples.
- Be able to tell the three ways a ratio may be expressed, and explain each.
- Students will learn notations to depict ratios: the word âtoâ, using
colon, and in written form (e.g., three hummingbirds to two flowers).
- Following directions.
- Think Creative (e.g., substituting materials in the exercise)
☛ Applicable Education Standards:
|
| CCSS
| 6.RP.A1; 6.RP.A.2; 6.RP.A.3
MPs 1,2,3
|
| NGSS
| MS-LS2-2
|
|
Session #1: Introduction to Math Ratios (Runtime 4:34)
☛ video
Present the concept of math ratios (proportion/relationships) and how they are
expressed both mathematically and in written language.
|
| Supplemental Discussion Ideas
|
| Environment / wildlife
| - What is the current environmental status of
hummingbirds globally?
- Is extinction a concern?
- What are some of the fascinating facts about
hummingbirds (e.g., wing beat speed, size,
migration distances)
- What types of plants attract hummingbirds, and why?
A good resource on hummingbirds
|
|
Session #2: Math Ratio Exercise (Runtime 15:00)
☛ video
Students will learn how to make a simple hummingbird feeder. They'll also learn to
make the food to go into the feeder, which will demonstrate the concept of a ratio.
|
| Supplemental Discussion Ideas
|
| Chemistry
|
Talk about solutions, relating the discussion to
the mixing of sugar and water from the exercise.
|
|
THE EXTRA MILE:
Check out these ratio practice sheets
here
5.3 FIBONACCI NUMBERS
ABOUT THE SERIES
The Fibonacci number series is a simple arithmetic series with connections to
nature, history and architecture. In addition, Fibonacci introduced to Europe our current
number system.
☛ Learning Objectives:
After going through the series, students will have basic understanding of:
- number series,
- ratios,
- measuring rectangular objects,
- and making graphs.
☛ Applicable Education Standards:
|
| NGSS
| CCs: Patterns, LS, PS, ESS, Grades K-8
|
| CCSS.
|
6.RPA.1; 6.RPA.2; 6.RPA.3; 7.RPA.A.1; 7.RPA.2;
MPâs 1, 2, 4, 8
(for Roman numerals): 4.NBT.A.2; 5.NBT.A.1
|
|
Session 1: The Fibonacci number series (Runtime 9:56)
☛ video
Introduces the Fibonacci number series, and shows where to find these numbers in Nature, from pineapples to pinecones.
Session 2: From the Fibonacci series to the Golden Ratio(Runtime 11:17)
☛ video
We look at the ratios between adjacent Fibonacci numbers, and that these approach the
Golden Ratio. The Golden Ratio in Greek and Roman architecture. Measure ratios of
rectangular objects around the house.
Session 3: Fibonacci brings the number zero to Europe (Runtime 16:52)
☛ video
Fibonacci encounters Arabic math in North Africa. He realizes that it is superior
to Roman numerals, and introduces it to Europe. Learn about different number
systems (Roman, Arabic, base-10, binary)
|
| Supplemental Discussion Ideas
|
| History
|
Fibonacci lived about 800 years ago in Pisa.
What was life like then in Pisa, in Europe, in
North Africa, and here in the American
Southwest?
Find images of Greek and Roman buildings, and
measure their proportions. Are these close to the
Golden Ratio? What about other famous
buildings?
|
| Geography
| where is Pisa, Italy, how close is it to North Africa, Greece, Spain, Egypt
|
| Math
|
What other number sequences can you make
up? What if you start a Fibonacci sequence with
different starting numbers (instead of 1 and 1)?
|
| Suggested References
|
Wild Fibonacci: Nature's Secret Code Revealed
by Joy Hulme 2005)
Blockhead: The Life of Fibonacci by Joseph
D'Agnese (2010)
Fibonacci sequence in Nature (pdf)
|
|
Section 6: Physical Sciences
6.1 ENERGY
ABOUT THE SERIES
Explore energy and forces in our lives.
☛ Applicable Education Standards:
|
| NGSS
|
K-PS2-1 Motion and Stability: Forces and Interactions
3-PS2
4-Ps3-2 Energy
5-PS2
Disciplinary Core Idea:
PS3A: Definitions of Energy
PS3C: Relationship Between Energy and Forces
|
|
Session #1: Energy (Runtime 12:04)
☛ video
This is an introduction to the types of energy and the forces (e.g., wind, heat, light,
sun). The video includes an activity to demonstrate forces and motion. Materials can
be found in the home to replicate the activity.
☛ Learning Objectives:
1. Learn key terms: energy, force, sources of energy
2. Understand that objects in motion are a result of energy forces
3. Understand that energy is neither created or destroyed but only moves
from one place to another
Other references you might want to refer to:
- Energy makes things happen, Kimberly Bradley (2002)
The book is read aloud by Peggy RingGenberg (not affiliated with
the SFAFS)
in this video
|
| Supplemental Discussion Ideas
|
| Energy Transfer
| Explore types of energy transfer, such as windmills, hydroelectric
dams, solar power, etc.
|
| Forces
| How does the strength of forces affect the transfer of energy?
|
|
Session #2: Energy- Force and Motion (Runtime 10:32)
☛ video
This is an introduction to the types of energy and the forces (e.g., wind, heat, light,
sun). The video includes an activity to demonstrate forces and motion. Materials can
be found in the home to replicate the activity.
This session uses the book, Duck in the Truck, by Jez Alborough.
(View a reading of this book recorded by 'Once Upon A Tome' - not affiliated with
the Alliance for Science)
here.
☛Learning Objectives for Students:
- How different forces (push and pull, balanced and unbalanced force) create
motion and affect the position of an object.
- How force and direction of force affect the position of an object.
- Language objectives: students will be asked in the video to respond in writing
(and orally if video is shown interactively), to various questions posed
throughout the video.
- Rolling object activity will reinforce the concept of varying amounts of force
and how it influences an objectâs movement.
- Math tasks include: measurement, graphing and the use of Venn Diagrams
(although the term is used in the video)
NOTE:
For the three rolling objects activity, the students should kneel down to blow the objects at the object level whether on a floor or table. The other two trials are done with a flicking motion ofone and then two fingers to make the object move. (the premise is that two fingers provides a greater force than one finger).
|
| Supplemental Discussion Ideas
|
Force and motion -
building the Pyramids
|
Ask students heavy objects were moved in the
past. How did the Egyptians move the heavy
pyramid stones?
|
|
THE EXTRA MILE: The Movement of Objects, in
Appendix B
THE EXTRA MILE: Pushing and Pulling, in
Appendix C
Investigating Forces and Analyzing the Movementof Objects 5E (Engage,
Explore, Explain, Elaborate, Evaluate) lessons offer opportunities to
extend students~ STEM experiences and embed literacy activities. Each
lesson is self-contained and includes science and language objectives,
instructional procedures as well as a link to the book, Move It!
|
Section 7: Astronomy
7.1 Investigating Moon Craters (Run time: 5:00)
☛ video
This module is intended for Grades 2-3.
Students conduct an investigation with materials readily available at home to study
how moon craters form. They use sand and different sized rocks to form the craters.
Students document their observations throughout the investigation and come
together in a meaning making circle to answer the questions:
- Is there a pattern to how craters form?
- Do larger objects make deeper craters?
- Do smaller objects make craters that are shallower?
- How did the craters on the Moon form?
☛ Learning Objectives for Students
- Be able to identify craters on the surface of the Moon.
- Be able to describe craters and explain how they form.
- Be able to explain that the Moon has many more craters than Earth because it
does not have an atmosphere.
- Be able to identify and describe patterns in the crater formation process.
☛ Applicable Education Standards
|
| NGSS
|
K-4 Benchmark I: Know the structure of the solar system
and the objects in the universe.
Grade 3 Performance Standards
1. Describe the objects in the solar system (e.g., sun,
Earth and other planets, moon) and their features (e.g., size, temperature).
2. Describe the relationships among the objects in the
solar system (e.g., relative distances, orbital motions).
|
|
|
|
Supplemental Discussion Ideas
|
| Craters
|
- Are there craters on Earth?
- Why does the Moon have many more craters
than Earth?
- How does a crater form?
- Is there a pattern to how craters form?
- Do larger objects result in deeper craters?
- Do smaller objects form craters that are shallower?
|
|
THE EXTRA MILE: Learning about Space, in
Appendix D
Section 8: STEM Fair Preparation
This is a series of videos that provides information and instructions to students
should they wish to work on a project for presentation at a STEM Fair.
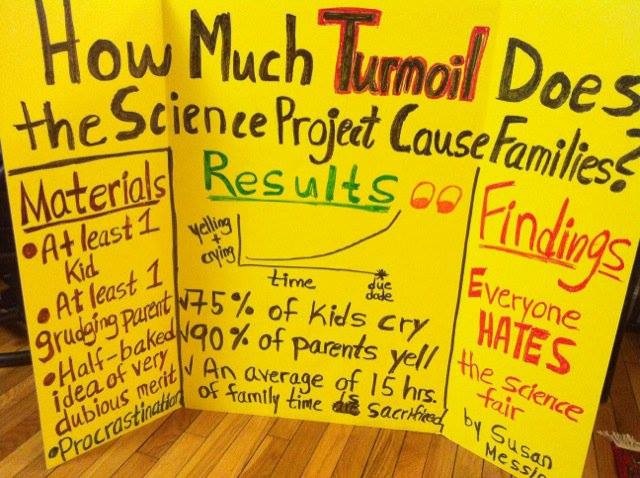
8.1 HOW TO DO STEM FAIR PROJECTS (Run time: 12:04)
☛ video
Veteran science fair judges Bruce Abell and Dean Gerber share tips for planning and
carrying out a science fair project. They present the key elements for making a
project successful. Learn now to:
- turn a weak project into one that is much better developed
- do research on a topic,
- make measurements to collect data in a notebook,
- include variables in your experiment (i.e., changing only one thing at a time),
- draw a table, and
- report on the science project using a trifold board.
☛ Learning Objectives for Students
- Ask questions and define a problem.
- Plan and carry out an investigation.
- Collect, analyze, and compare data by completing a table to organize the
information and develop a graph to describe results using evidence.
- Communicate conclusions using the data collected and graphed.
☛ Applicable Education Standards
|
| NGSS
|
Science and Engineering Practices (1, 3, 4, 6, 8)
|
|
|
| Supplemental Discussion Ideas
|
| The following Alliance videos address other subjects that are useful when
doing STEM Fair projects.
|
| Science Journals
| See 8.2 in this Guide
|
| Calculating Averages
| See 5.1 in this Guide
|
|
THE EXTRA MILE: Popcorn, in
Appendix E
Another way to get students to think about topics for a science fair
project, is to consider things in their daily lives. This exercise
outlines an investigation into different brands of popcorn.
THE EXTRA MILE: The Cat's Meow, in
Appendix F
This is a less formal method of exposing students to science
investigations.
8.2 WHAT IS A SCIENCE JOURNAL (Run time: 3:35)
☛ video (English) (runtine 3:31)
or
☛ video(Spanish) (runtime 3:19)
Scientists collect a lot of data! To help them remember everything about their
experiments, they keep it organized and safe in a journal. This video will give you
some tips for creating your own science journal.
☛ Learning Objectives for Students
- How to organize your thoughts.
- How to record data following a scientific method.
- Practice observation skills.
☛ Applicable Education Standards
|
| NGSS
|
Science and Engineering Practices
- Asking questions and defining problems
- Planning and carrying out investigations
- Analyzing and interpreting data
- Using mathematics and computational thinking
- Constructing explanations and designing solutions
- Obtaining, evaluating and communication information
|
|
8.3 GRAPHING & PRESENTING DATA (Run time: 7:05)
☛ video
This video will teach you how to visually present the data that you collect for your
STEM Fair project.
☛ Learning Objectives for Students
- Learn key terms: vertical and horizontal lines of a graph. Labeling a graph
- How to plot data.
- Relate changes in data to averages.
- Show changes in time or other variables in an exploration.
- Understand when to use a bar graph vs. a line graph.
☛ Applicable Education Standards
|
| CCSS
|
MPs: 1, 2, 3
2.MD.B.6; 2MD.D.9; 2MD.D.10
3.MD.B.3; 3MD.B.4
4.MD.B.4
5.G.A.2; 5.G.A. 3; 5.G.B.4
6.NS.C.8
|
| NGSS
|
SEPs: Analyzing and interpreting data. Using
mathematical an computational thinking.
|
|
|
|
Supplemental Discussion Ideas
|
| Variables
| Understanding what a variable is in science
exploration, and how to represent it visually.
|
| Other observations
| The video provides suggestions for other at-home
activities for developing graphing skills.
|
|
The following Alliance videos address other subjects that are useful when
doing STEM Fair projects.
|
| Science Journals
| See 8.2 in this Guide (importance of recording your data)
|
| Calculating Averages
| See 5.1 in this Guide
|
| Energy Part 1
| See 6.1 in this Guide (provides other examples of
graphing, e.g., energy use in the home)
|
|
8.4 STEM FAIR PROJECT GUIDE
This is a series of 8 videos that provides instruction on STEM Fair
projects, starting with thinking of your idea, to presenting your
results. This series should be considered a companion to the
video "How To Do A Science Fair Project".
Learning Objectives for Students
Understand the end-to-end process for doing a STEM Fair project. This involves:
- Critical thinking (there are a number of things to think about before choose an
subject for which you will design an experiment.
- Organization skills (planning steps for the experiment, keeping a journal).
- Literacy (research of the chosen topic is required).
- Mathematics (collection, organization and analysis of data and measurements).
- Oral and written communication skills (when experiment results are prepared and
presented at the STEM Fair).
☛ Applicable Education Standards:
|
| NGSS
| Dimension I: Science and Engineering Practices:
Asking questions and defining problems; Developing and using models; Planning and carrying out investigations, Analyzing and interpreting data; Using mathematics and computational thinking; Constructing explanations and designing solutions; Engaging in argumentfrom evidence; Obtaining, evaluating, and communicating information
|
|
Session #1: Getting Started
☛ video (runtime 04:07)
Overview of basic components of a STEM Fair project, and the things you need to think about when deciding what you want to do for a project.
Session #2: Researching your Topic
☛ video (runtime 05:04)
Introduces the science journal and describes the content. Provides an overview of the different types of research sources.
Session #3: Getting Ready for the Experiment
☛ video (runtime 04:07)
Explains concepts related to experiments: measurements, controls, variables, trials
Session #4: Making a Prediction and Testing It
☛ video (runtime 03:55)
Turning your questions into educated guesses, or predictions. How to test your predictions
through your experiment
Session #5: Making a Data Chart to Record Measurements
☛ video (runtime 06:04)
Through a series of examples, this video demonstrates how you collect data and perform relevant
measurements for your experiment. It also explains how to record the information in a table.
Calculating averages of your data is demonstrated.
Session #6: How to Graph Results
☛ video (runtime 06:54)
Learn how to take the tabular information you collected and display that in a graph.
Mr. Science covers different styles of graphs (bar, linear, pie chart). He explains when
you might want to use one instead of another.
Session #7: Results/Conclusions
☛ video (runtime 03:24)
Mr. Science explains how to read the tables and graphs to determine conclusions from your experiment. He also discusses comparing your results against your original predictions.
Session #8: Organizing Your Project
☛ video (runtime 04:52)
The video covers the different ways you can present your STEM Fair project to the judges. Tips are provided to make your presentation well organized and interesting.
|
| Supplemental Discussion Ideas
|
| The following Alliance videos address other subjects that are useful when
doing STEM Fair projects.
|
| Science Journals
| See 8.2 in this Guide
|
| Making Graphs
| See 8.3 in this Guide (graphing and presenting data)
See 6.1 in this Guide (provides other examples of graphing... e.g., energy use in the home)
|
| Calculating Averages
| See 5.1 in this Guide
|
|
|
APPENDIX A
(From here)
THE EXTRA MILE: And The Beat Goes On
This lesson provides an opportunity to apply averaging and graphing skills without
materials. The investigation can be done with small groups as well as with the whole
class. The sheet can be sent electronically to students for them to use, and data can
be shared with all students at the end of the activity.
☛ Learning Objectives for Students:
1. Determine what type of exercise increases heart rates.
2. Collecting data in real time (as they undergo the activities)
☛ Applicable Education Standards:
|
| NGSS
| LS1; LS2; LS3; SEPs 1,3,5,8
|
|
How to run the exercise:
- Ask the question: What is the relationship between ______ and ______ ?
- State your hypothesis: I think ____________________________
- Identify the variables
| Independent Variables (IV)
| Dependent Variables (DV)
|
|
|
|
|
|
|
- Materials required
- Watch with a second hand
- Copy of this data table.
Pulse /
Activity
| At Rest
| After slow walking
| After quick walking in place
| After jogging in place
|
| Heartbeats per minute
|
Trial #1=
Trial #2=
Trial #3=
Average=
|
Trial #1=
Trial #2=
Trial #3=
Average=
|
Trial #1=
Trial #2=
Trial #3=
Average=
|
Trial #1=
Trial #2=
Trial #3=
Average=
|
- Exercise directions
1. Work with a partner.
2. You will take your pulse at your wrist or your throat.
3. Your partner will be the time keeper using the watch. Count the number of
heartbeats for 1 minute after each activity.
4. Fill in the information on the table.
5. Graph the results by plotting the averages for each activity. Be sure to label
the x-axis and the y-axis.
6. Describe the results:
- Write (or orally share) what you did.
- Look at the Graph, describe in writing (or orally) what it says; tell its story.
- Describe what you found out about the relationship between ____ and ____.
- Describe the relationship between IV and DV.
7. Write the conclusion.
- Restate the question and describe the relationship between the IV and DV.
- Restate the hypothesis and what was found.
- Explain the outcome of the experiment
back
APPENDIX B
(From here)
THE EXTRA MILE: The Movement of Objects
Investigating Forces and Analyzing the Movement of Objects 5E (Engage, Explore,
Explain, Elaborate, Evaluate) lessons offer opportunities to extend studentsâ STEM
experiences and embed literacy activities. Each lesson is self-contained and includes
science and language objectives, instructional procedures as well as a link to the
book, Move It!
Learning Objectives for Students:
For the following science objectives, students will be able to:
- explain how a push or pull affects how an object moves,
- explain the difference between a push and pull,
- explain the way to change how something is moving when pushed or pulled,
- analyze changes in the movement of objects, and
- respond to the questions âIs it a push?â or âIs it a pull?â for the alpha-boxes.
For these language objectives, students will:
- Orally retell the story,
- respond orally to the âIs it a pull or push? questions, and
- read the information in the pull and push alpha-boxes.
The Science Focus
- When a force is exerted, things move. Students may be unaware that a force
affects the motion of an object.
- A force has a direction. A direction may be back and forth, straight, fast or
slow, or in a circle, zigzag, or curve.
- By pushing or pulling, an object moves.
Materials
- Books: Duck in the Truck by J. Alborough or Push and Pull
by H. J. Endres.
- Paper for the anchor chart and different color markers. (First use one color,
then change the color of the marker for new information; for corrections,
add a third color.)
- Chart paper for two alpha-boxes (one for push and one for pull).
Engage
- Read Duck in the Truck or Push and Pull, by
Nelson or Endres to stimulate interest in the topic.
- Ask students questions as you read to get them to think about the topic of
forces.
- To build on prior science knowledge of force and motion, have objects to jog
their memories about ramps, marbles, trucks, cars, etc.
- In groups, students retell the story that was just read to them, either orally or
in writing in their science notebooks.
Explore
- Point to a truck or another object and ask What is a push? and What is a pull?
Have these objects available for students to use.
- Follow up if students are having difficulty and continue to brainstorm answers
to these questions. They should understand that pushes and pulls are ways to
use force to move an object. During this discussion, record what the students
say on an anchor chart.
- Continue the discussion by focusing on the amount of force that is needed to
move different objects.
- Ask the students, Did you use push or pull forces when you got up off the floor
to stand? Are there other ways to use your bodies to push or pull?
Explain
- Construct two alpha-boxes on chart paper. Each should look like the following.
Be sure to have two charts. Use the alpha-boxes when students respond to
the questions Is it a push? or Is it a pull?
- Ask students to think of things that can be pushed. When they mention
something, write its name in the alpha-box that begins with the same letter.
See the chart below for an example. This activity can continue for several
days, serving to activate prior knowledge when students read the words on
the chart, but also to introduce new ones.
| Push Words
|
| a
| bike
| c
| d
|
| e
| f
| g
| h
|
| i
| j
| k
| l
|
| m
| n
| o
| p
|
| q
| remote
| swing
| t
|
| u
| v
| w/x
| y/z
|
| (spacer) xs
|
| Pull Words
|
| a
| bike
| c
| d
|
| e
| f
| g
| handle
|
| i
| j
| knob
| l
|
| m
| n
| o
| p
|
| q
| Rope
| s
| t
|
| u
| v
| w/x
| y/z
|
|
Elaborate
- The students return to the alpha charts once there are examples in the boxes.
- After the students have generated a variety of words that have been placed in
the boxes, they read the words.
- Students in groups to ensure that the words are in the correct boxes use a
variety of materials to test their ideas.
- Students use the claims and evidence scaffold to support their reasons for
any changes that are made.
Evaluate
- Students come together and the recorder reporters from the groups take
turns to share the changes, if any, that their group made in the alpha-boxes.
- They share their reasons (claims and evidence) if they think a word was not in
the correct box; the teacher draws a line through the word and adds it to the
appropriate box with a different color.
Source: Adapted and modified from Letâs Use Force, by M. L. Damjanovich, 2011. Used with permission.
Retrieved from the companion website for Growing Language Through Science, Kâ5: Strategies That Work by
Judy Reinhartz. Figure 6.4. Thousand Oaks, CA: Corwin, www.corwin.com. Copyright © 2015 by Corwin. All rights
reserved. Reproduction authorized only for the local school site or nonprofit organization that has purchased this
book.
back
|
APPENDIX C
(From here)
THE EXTRA MILE: Pushing and Pulling
Learning Objectives for Students:
For the following science objectives, students will:
- move objects in as many different ways as possible by pushing and pulling them,
and
- use science terms that will demonstrate when they share and report out in writing
that they understand force.
For these language objectives, students will:
- orally describe what happens when the teacher uses a ramp and drops a ball from
the top, and when they push or pull different object,
- complete in writing the sentence frames on the Make it Move sheet twice,
- share orally with group members what they observed and did to get the objects to
move, and
- use words and phrases on index cards and construct a sentence using science
information from the lesson.
The Science Focus
- Force is a push or pull that produces a change in the motion of an object.
- The position and motion of objects can change by pushing or pulling them.
- An unbalanced force makes a resting object move, brings the moving object to
rest, or changes its direction.
- Changing the surface on which an object moves can make it easier or harder for
the object to move because of friction, a force that acts when two surfaces rub
against each other.
- The steepness of a ramp affects how far a ball rolls.
Materials
- Assortment of objects: balls, cardboard tubes, ramps, blocks. (This exercise could take place in the block center so students can investigate using these materials.)
- Meter sticks (you can put them end to end and count the number of meter sticks
the object rolled).
- Chart paper and book, Move It!
Linked here
- 2 copies of the Make It Move sheet for each group.
Engage
- Review the previous dayâs work by having students observe as some of the
balls and other materials are pushed and pulled.
- Students describe orally what they think (predict) will happen when the
teacher uses a ramp and drops the ball from the top.
- Read the beginning of the book, Move It! (2005) by A. Mason, to get students
interested.
Explore
- Each group has an assortment of balls, cardboard tubes, ramps, blocks, and
meter sticks.
- Students explore as many different ways as possible to make a marble
(object) move from one place to another.
- Give groups of students the Make It Move sheet with sentence frames like the
ones below.
They respond orally or in writing:
- I used ______________________________________________ object.
- I made the object move by __________________________________.
- Another way I made it move: _________________________________.
Explain
- Have students share with group members what they did and observed before
working with the whole class.
- Bring the students together to brainstorm what they discovered and learned
about pushing and pulling during their investigations.
- Use an anchor chart to record the group ideas/comments. To get the
brainstorming started, here are some questions to ask:
- What objects rolled?
- What do these objects have in common?
- How did you get an object to roll?
- Did you stop an object from rolling? How did you stop it?
- What questions can we ask to guide our investigations?
- Continue to read the book Move It! to add to the discussion on force.
Elaborate
- Return to the anchor chart, where group comments were recorded.
- Have students ask questions before they continue to investigate.
- Have each group try out the ideas from another group to see if they get the
same results.
- Have each group complete a new Make It Move sheet.
- Have each group report out again and with a different color pen; the teacher
records their responses on the anchor chart.
Evaluation
- Take the pushing and pulling ideas from the anchor chart.
- Have the students pick out words (adjectives, nouns, verbs) and phrases and
write (draw) them on 5 Ă 7 index cards or cut sentence strips.
- In working in groups, students use a chart like the one below and put the
cards in the appropriate column. (Previously, teachers worked with students
on adjectives, nouns, verbs, and phrases, and used a chart like the following.)
- Once students have placed the cards in the specific column, they are ready to
construct sentences using the information from the chart. They read their
sentences to the whole class. Then the whole class reads the sentence
composed by each group.
| Adjectives
| Nouns
| Verbs
| Phrases
|
| round
| marble
| rolled
| down the ramp
|
| rubber
| ball
| bounced
| on the floor
|
Retrieved from the companion website for Growing Language Through Science, Kâ5: Strategies That Work by
Judy Reinhartz. Figure 6.3. Thousand Oaks, CA: Corwin, www.corwin.com. Copyright © 2015 by Corwin. All rights
reserved. Reproduction authorized only for the local school site or nonprofit organization that has purchased this
book.
back
APPENDIX E
(From here)
THE EXTRA MILE: Popcorn
Another way to get students to think about topics for a science fair project, is to
consider things in their daily lives. This exercise outlines an investigation into
different brands of popcorn.
Concept: Elaboration
Elaborate is the part of the science lesson where students come to know and
understand the steps to an investigation. It starts with a question. In this
experimental investigation, students use the question frame:
What is the relationship between ____ and ___ ?
First, the word relationship should be discussed and defined, and examples provided
and placed on the science word/phrase wall. A graphic organizer is constructed with
the word relationship in the center, with lines radiating from the word to demonstrate
what the students think the 'relationship' means.
Using this frame: What is the relationship between ____ and ___ ?
...opens the door to understanding variables (dependent and independent). For
example:
What is the relationship between the brand of popcorn
and the number of kernels popped?
The BRAND of popcorn is the independent variable; the NUMBER OF KERNELS is the
dependent variable.
- After coming up with a class question (using the question frame noted above),
take a minute to analyze the question for cause-and-effect phrases. For example,
in the popcorn question, the BRAND of popcorn is the cause; the NUMBER OF
KERNELS popped is the effect.
- Students then formulate a hypothesis that can be tested.
- Students design and conduct an experiment, make observations, collect data,
and record them on the âTâ data table:
BRAND OF POPCORN
(the CAUSE, independent variable)
| # OF KERNELS POPPED
(the EFFECT, dependent variable
|
| Brand A
|
|
| Brand B
|
|
| Brand C
|
|
- Students plot the data from the data table to a graph (they can choose the type-
bar, line, circle etc.), labeling each axis with the names of the variables.

- Now the students are ready to analyze the data they have collected. One place to
begin is to review the information plotted:
- o Which brand has the most kernels that popped,
- o the least that popped,
- o and somewhere in between.
Looking at the graph, decide which brand is the best to buy, based on the
evidence they uncovered in this experiment. Ask: Why do you think so?
If they need support in coming up with answers, why do you think the Claims and
Evidence Scaffold that follows may prove helpful?
Students go back to the 'T' table and the graph to fill in the Claims and Evidence
Scaffold. They think about their âclaimsâ or conclusions made about the popcorn
brand (best, worse, in between). Once a claim has been identified, it must be
supported with evidence.
The key question is: Is there evidence to support your claim of best, worst, in
between? If the answer is âyesâ students go on to the second claim, finding
evidence in the data collected and plotted on a graph.
Taylor and Villanueva (2014) provide the following series of questions that
teachers can ask to assist students in completing the Claims and Evidence
Scaffold. The following questions and sentence frames provide a template for
student responses.
- What do you claim to be true from your investigation?
- How can you prove your claim? (How can you back up your claim?)
- With the whole class, ask Who agrees with each groupâs claim?
How many agree with ____ groupâs claim and evidence?
How many disagree with ___ groupâs claim and evidence?
Student response sentence frames might include:
I agree with ____ claim because ____.
I disagree with ___ claim because ___.
- d. Finally, ask Which of the following claims is most like yours [state the claim]?
Students may respond: My claim is
- ...similar to ___.
- ...somewhat similar to ___.
- ...completely different from my classmates.
- Students in the upper grades will identify and then describe the
variables in their
investigation based on the question they posed and the data they collected.
- In their science notebooks, students will do the following:
- Write the question and make a hypothesis, which is an idea that can be tested
by an experiment or observation (Sciencesaurus, 2006).
- Sketch a 'T' data table using the question and the variables they identified.
Taking the popcorn question, What is the relationship between the brand of
the popcorn and the number of kernels popped?
- Summarize the findings, looking at the information in the 'T' table and
drawing conclusions byu using sentences following these frames: In this
investigation, I did ___ or learned that ___.
- They use the information from their Claims and Evidence Scaffold to respond.
Emphasize that every claim must be supported by evidence.
back
APPENDIX F
(From here)
THE EXTRA MILE: The Cat's Meow
This is a less formal method of exposing students to science investigations.
Learning Objectives for Students:
(Science objectives) Students will:
- carry out an investigation with group members,
- construct explanations for their observations,
- explain cause and effect events during the investigation.
(Language objectives) Students will:
- read or follow directions provided orally,
- explain orally to group members the results of the investigation,
- construct explanations in writing about their observations in their science
notebooks.
Materials needed per group:
- Whole (i.e., full fat) milk in a beaker or container that has a spout
- Paper plate â strong dinner size
- 4 different containers of food coloring
- 1 toothpick
- Dish detergent in a small plastic container
- Science notebooks
Procedures
- In your groups, decide who is going to be the
PI (Principal Investigator)
MM (Material Manager)
MD (Material Director)
RR (Reporter Recorder)
- Pour the milk into the plate, covering the bottom.
- Take 4 different containers of food coloring.
- Add a drop of each color to the edge of the plate at the 3, 6, 8, 12 positions.
- Dip the toothpick into the detergent.
- Place the toothpick in the center of the plate and hold it for a moment. DO
NOT press too hard because you do not want to make a hole in the paper plate.
Communicating what you observed
- Talk/share/discuss with group members what you saw.
- What do the changes look like to you? Do you see anu patterns? Draw and
write what you saw or think happened in your science notebook.
- What do you think is causing these patterns and/or changes? Write your ideas
down in your science notebook.
- Construct an explanation in your science notebook along with pitures based
on their observations and discussions with group members.
Assessment
- Monitor groups and listen to their interactions with group members. How are
they describing what took place when they added food coloring and detergent
to the milk?
- Read their science notebook entries. Have they identified any patterns? How
did they explain what took place?
back
|
Appendix G
(From here)
Water pollution
☛ Applicable Education Standards:
|
| NGSS
| 2-ESS2-2 Earth's Systems
|
|
Water Purification
Make a small purification system to see if some dirty water can be cleaned.
Please refer to: water wonders
Water Conservation
Think about saving water around your own house.
This is a good animated video on saving water (not affiliated with the Alliance):
saving water
Additional Resources:
Web:
the water cycle
Book: The Magic School Bus At The Waterworks by Joanna Cole
back
Revision History
|
| Version
| Date
| Name
| Description
|
| 1.0
| 07Aug2020
| Caren Shiozaki
| First release issued
|
| 2.0
| 10Feb2021
| Caren Shiozaki
| Second edition released: Includes STEM Fair Project series;
moves all 'Extra Mile' instructions to separate appendices.
|
| 2.1
| 26Oct2023
| Hubert van Hecke
| Moved science fair videos to Youtube
|
|
|

(end)
|


