copper tape circuits video
Our multimeter
| (1) When you fold the corner over and put the clamp on, the trace on the left will touch the top of the pill battery, and the trace under the battery touches the opposite side of the battery. If you look closely, one side of the battery has a "+" mark on it, meaning it's the positive side of the battery. Therefore the opposite side is the negative. | 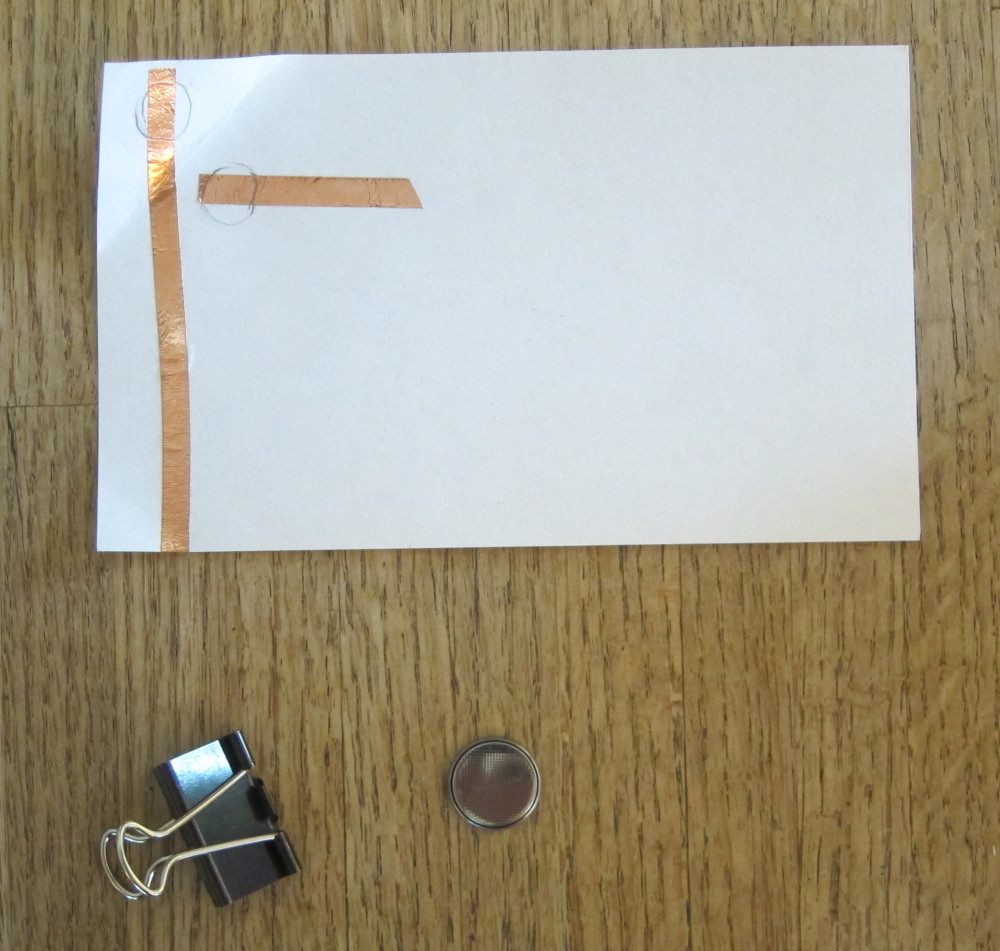
| ||||||||||||||
| (2) Fold over the corner and put the clip on, this connects the battery. Measure the voltage between the copper strips. The meter is set to the DC (direct current) setting, 20 Volts. We want the top trace to be potitive, so that's where the red probe goes. The black probe is always ground, or negative. The meter should read a little over 3V. If a negative number shows, the flip the battery over. | 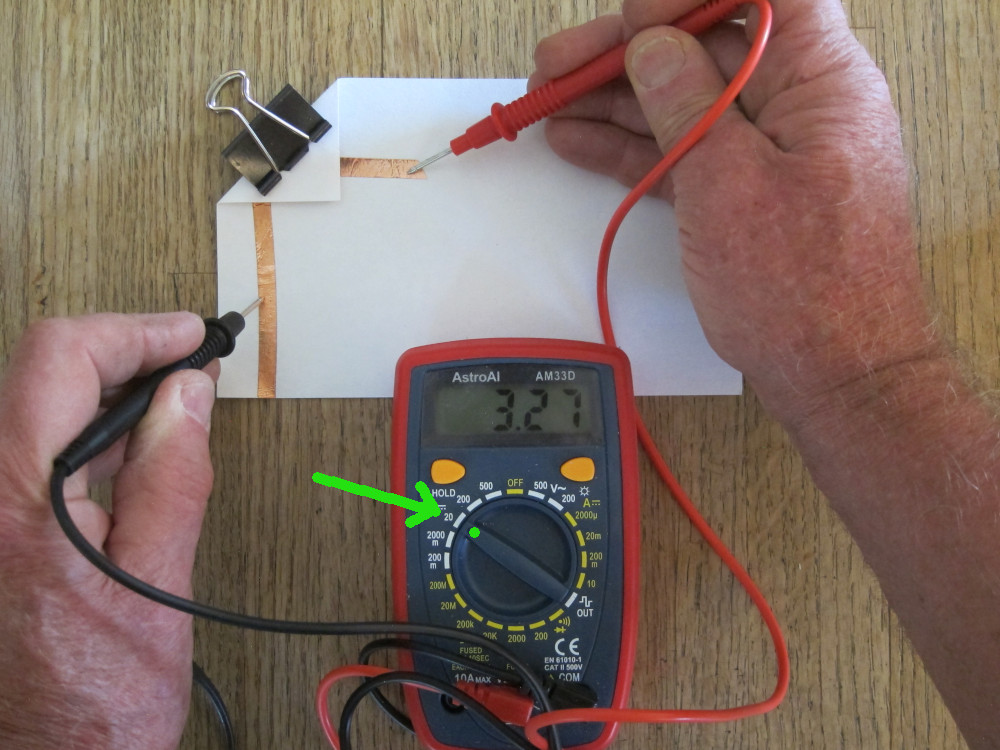
| ||||||||||||||
| (3) Now mark the traces + and -. Find an LED. Each LED has a long leg and a short leg. The long leg will connect to the positive trace. | 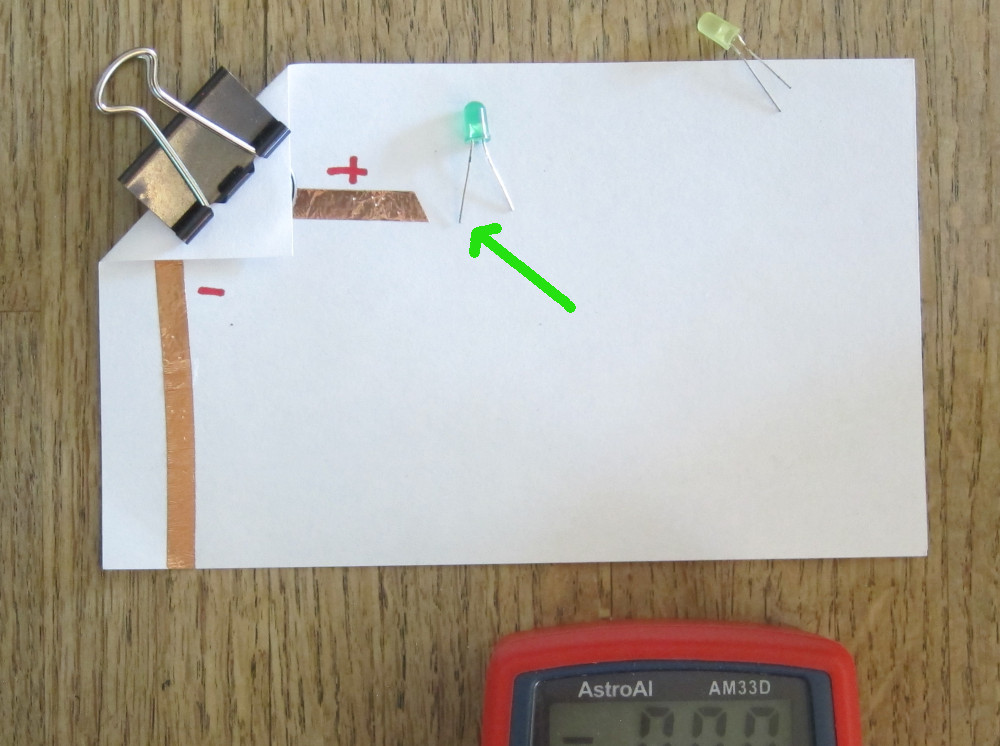
| ||||||||||||||
| (4) Connect the LED to the positive trace, and from the short leg, copper tape goes down to the edge of the paper. To make a good connection, lay the LED lead on top of a trace, and put a small piece over the top of the wire. That way there is contact on both sides of the LED leg.
| 
| ||||||||||||||
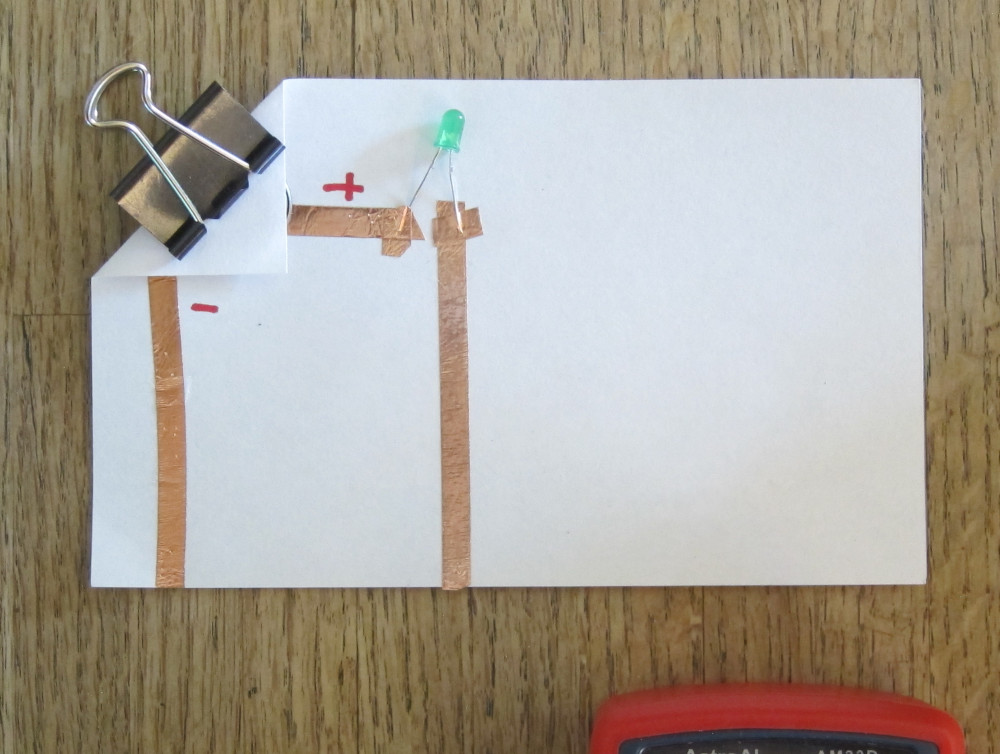
| (5) You can make the final connection with an alligator clip lead, or with another piece of tape. You can also use the big switch, and connect it with 2 clip leads. Now the circuit is complete, current can go around, and the LED lights up brightly. | 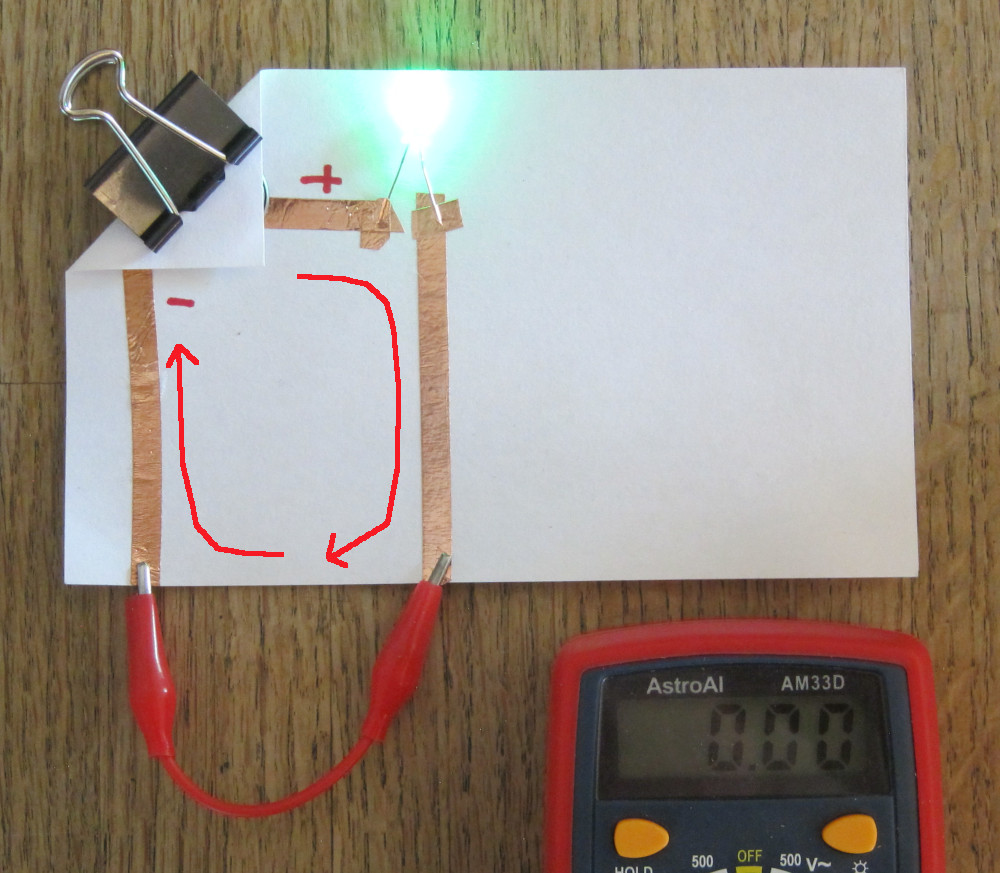
| ||||||||||||||
| (6) We can measure how much current flows around the circuit. Note the meter is set to to the current sector (A for Ampere), to the 200m (milliAmpere) setting. The current flows through the meter, and it reads 7.7 mA. | 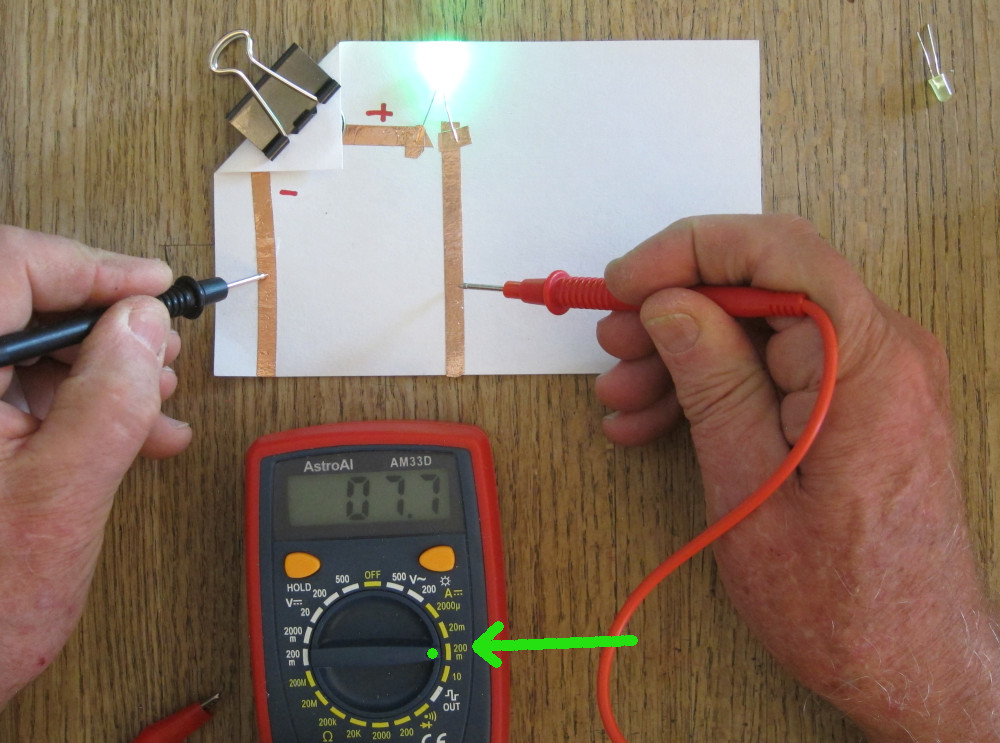
| ||||||||||||||
| (7) Next find a 100 Ohm resistor. The meter is set to the sector labeled (the Greek letter Omega), which stands for Ohms, the unit for electrical resistance. This resistor read 100 Ohms. | 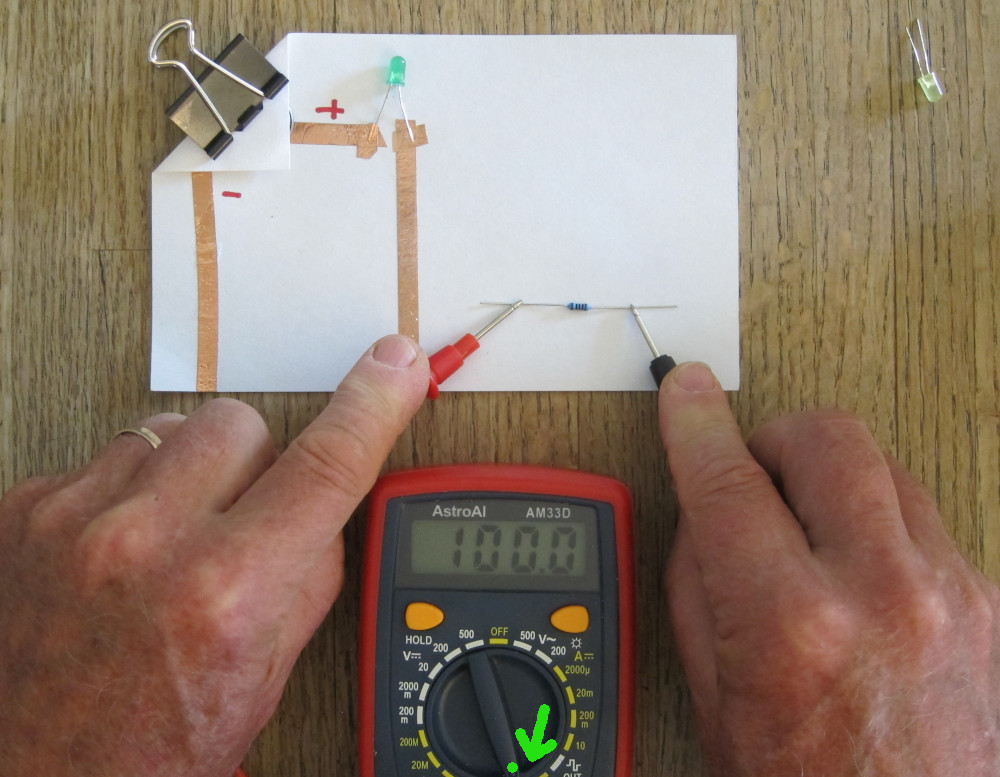
| ||||||||||||||
| (8) Let's have a closer look at the resistor. It has 4 colored bands,
In our case, the bands are brown (1), black (0), red (×100), which means 10×100 = 1000 Ohms. The last band is gold, which means a tolerance of ±5%, and 1006 Ohms is well within 950-1050 range. | 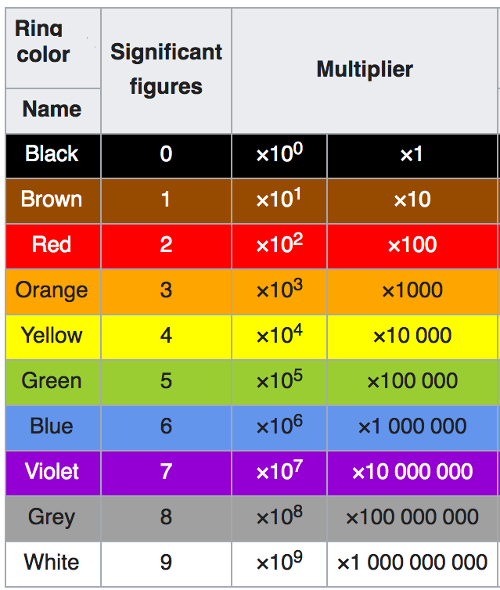
(9) | Connect the resistor, and complete the circuit with a clip lead (or tape, or switch). Note the LED is not lit up as bright as before, since the resistor impedes the flow of electricity. |
(10) | Now if I measure the current, it reads 3.0 mA, lower than before. |
Here is where you can let your artistic side shine. If you cut the tape down the middle, it is easier to make curves. |
You can use more than one LED. Note the polarity is labeled with + and −
Experiment!
|
| |
| |
|
|

Hubert van Hecke Last modified: May 2025